
Using Awk to Bore Deep Holes
Table of Contents
Introduction
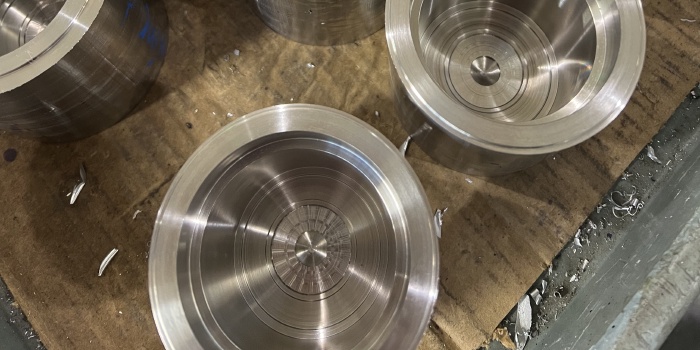
I’ve been making stator housings for underwater thrusters, in 316 stainless steel. I use Fusion 360 to create tool paths, and am generally happy with it, but needed a bit of extra software this time.
You can see an some of the interiors after the first operation in the photo above. They are fairly deep and I wanted a fairly rigid (i.e. thick) boring bar after drilling it out to two inches wide.
The problem I needed help with was clearing chips. I tried boring horizontally and vertically. I tried adding a very aggressive peck. But still, I found myself hovering around the machine, waiting for a nest of chips to get big, and then manually waiting for the next time the tool retracted to pause things and clear the chips. Finally I figured out a way to make the machine automatically pause and wait for me.
I’m writing this article for an audience of machinists who understand g code but may not be familiar with awk.
Awk Script
I ended up writing my first awk script as it seemed like a reasonble match for this problem with its ability to specify patterns and actions.
I’ve broken the script into pieces here with explanations and the full script is further down.
#!/usr/bin/env gawk

BEGIN { in_zone = 0 found_zone = 0 }
In the snippet above, BEGIN is a special pattern, run at the start
of the script and { in_zone = 0 found_zone = 0 } is an action
associated in with the pattern. The action sets two variables to 0
(false). It isn’t strictly necessary in awk; I believe that
undeclared variables are considered to be 0/false but I find it is
often more clear to be explicit about things like this.
in_zone is a flag, set to true when we are processing lines from the tool path that I want to modify.
found_zone is a flag that is used to track if we ever found the zone
and is meant to help guard against the situation where something
changed and the script silently fails. The script is fragile as it
depends heavily on things that can change inside Fusion and I tried to
add guards like this to notify me when things are going wrong.
1
In awk, each time a line is processed (in our case, from the g code output by the Fusion post-processor), every pattern is evaluated in order and if it matches, the associated action is run.
1 is a pattern that always evaluates to true and because I did not
specify an action, awk defaults to writing the current line out
unmodified.
/N17 T909$/ {
  if (in_zone != 0) {
    print "already in zone and found N17 T909$" > "/dev/stderr"
    err = 1
    exit 1
  }
  in_zone = 1
  found_zone = 1
  z_cnt = 1
}
/N17 T909$/ is a regular expression pattern which matches if a line
ends with N17 T909 (specifying it this way means it will work
whether or not a block delete character precedes it). The N17 and
T909 are part of the fragility of this script and the script needs
to be modified if things change. In retrospect it might have been
useful to key off of the comment at the beginning of the tool path,
rather than the line number.
The if block is some error checking.
The rest of it is keeping track of the fact that we have entered the
zone and setting z_cnt to 1. The idea is that the script notices
every time the boring bar retracts, and increments z_cnt and uses
that to decide when to insert M0. More about this below.
/N18 T909/ {
  if (in_zone == 0) {
    print "not in zone and found N18 T909" > "/dev/stderr"
    err = 1
    exit 1
  }
  in_zone = 0
}
This pattern notices that we are now past the tool path we want to
modify. There is some error checking and we set the in_zone
variable to false.
/^G0 Z0.19$/ {
  if (in_zone != 0) {
    z_cnt = z_cnt + 1
    if (z_cnt%2 == 0 && wrote <= 5) {
      print "M0"
      print "M08"
      print "M03"
      wrote = wrote + 1
    }
  }
}
This is the main part of the script. Every time we retract to
Z0.19 (more fragility, I know!), we increment z_cnt and then if it
is an even number (z_cnt%2 == 0) and we have written less than 6
M0 blocks (wrote <= 5), then stop everything, and when the cycle
start button is pressed, restart the coolant and spindle.
I arrived at this logic by observation. I found I could get two passes with the nest chips still being manageable enough. It helps that I am using pecking in that it makes it easier to remove them from the boring bar. Also, I found that after 5 stops, there was enough room in the hole for the coolant to clear the chips without my help.
END {
  if (err == 1) {
    exit 1
  }
  if (found_zone == 0) {
    print "never found N17 T909$" > "/dev/stderr"
    exit 1
  }
  if (in_zone != 0) {
    print "never found N18 T909" > "/dev/stderr"
    exit 1
  }

  printf "successfully inserted %d stops\n", wrote > "/dev/stderr"
}
This final block runs at the end of the script and is mostly about handling errors.
Full Script
Here is the full script
#!/usr/bin/env gawk

BEGIN { in_zone = 0 found_zone = 0 }

1

/N17 T909$/ {
  if (in_zone != 0) {
    print "already in zone and found N17 T909$" > "/dev/stderr"
    err = 1
    exit 1
  }
  in_zone = 1
  found_zone = 1
  z_cnt = 1
}

/N18 T909/ {
  if (in_zone == 0) {
    print "not in zone and found N18 T909" > "/dev/stderr"
    err = 1
    exit 1
  }
  in_zone = 0
}

/^G0 Z0.19$/ {
  if (in_zone != 0) {
    z_cnt = z_cnt + 1
    if (z_cnt%2 == 0 && wrote <= 5) {
      print "M0"
      print "M08"
      print "M03"
      wrote = wrote + 1
    }
  }
}

END {
  if (err == 1) {
    exit 1
  }
  if (found_zone == 0) {
    print "never found N17 T909$" > "/dev/stderr"
    exit 1
  }
  if (in_zone != 0) {
    print "never found N18 T909" > "/dev/stderr"
    exit 1
  }

  printf "successfully inserted %d stops\n", wrote > "/dev/stderr"
}
Other Ways I Could Have Approached This
I could have broken the tool path into 7 tool paths in Fusion, with different radii settings for each. An advantage of that is that there is no separate script to maintain and run. A disadvantage is that tweaks to the tool path become a lot more painful as I have to repeat them carefully 7 times. I understand that Mastercam has a feature meant specifically for this case, but don’t have any familiarity with it.
I could have modified the post processor. While I have modified post processors in the past successfully, I generally dislike doing that as it creates a burden to track future changes from autodesk and to merge them into my modified version.